こんにちは、AIチームの二宮です。
この記事は AI Shift Advent Calendar 2024の14日目の記事です。
はじめに
Model Context Protocol (MCP)とは、Anthropicから公開されたOSSで、LLMがさまざまなツールやリソースを活用するための標準プロトコルです。MCPはClaude以外のモデルでも利用できるように設計されています。そこで、今回はOpenAIのモデルを用いたMCP Clientを実装してみます。
MCPの実装は、Anthropicが公開しているTutorialが非常にわかりやすいので、そちらを進めていただくことをおすすめします。特に今回はQuickstartでのMCP Serverの実装と、Building MCP clientsでのMCP Clientの実装を終えた状態から始めます。ディレクトリ構成は以下のようになっています。
.
├── mcp-client
│   ├── README.md
│   ├── client.py
│   ├── pyproject.toml
│   └── uv.lock
└── weather
    ├── README.md
    ├── pyproject.toml
    ├── src
    │   └── weather
    │       ├── __init__.py
    │       └── server.py
    └── uv.lock
OpenAIモデルでのMCP Clientの実装
公式Tutorialで紹介されているMCP Clientの実装ではClaudeのFunction Callingを使っているので、ここをOpenAIのFunction Callingの記述に変更します。Claude Desktop Appも同様の実装なのかは不明ですが、その挙動を見る限り同様のことが実現できます。また、AnthropicとOpenAIのFunction Callingの実装方法はかなり類似しており、以下のclient.pyの実装ではMCPClientクラスのprocess_queryの変更がほとんどです。
import asyncio
import json
from contextlib import AsyncExitStack
from typing import Optional

from dotenv import load_dotenv
from mcp import ClientSession, StdioServerParameters
from mcp.client.stdio import stdio_client
from openai import OpenAI

load_dotenv()  # load environment variables from .env

class MCPClient:
    def __init__(self):
        # Initialize session and client objects
        self.session: Optional[ClientSession] = None
        self.exit_stack = AsyncExitStack()
        self.openai = OpenAI()

    async def connect_to_server(self, server_script_path: str):
        """Connect to an MCP server

        Args:
            server_script_path: Path to the server script (.py or .js)
        """
        is_python = server_script_path.endswith('.py')
        is_js = server_script_path.endswith('.js')
        if not (is_python or is_js):
            raise ValueError("Server script must be a .py or .js file")

        command = "python" if is_python else "node"
        server_params = StdioServerParameters(
            command=command,
            args=[server_script_path],
            env=None
        )

        stdio_transport = await self.exit_stack.enter_async_context(stdio_client(server_params))
        self.stdio, self.write = stdio_transport
        self.session = await self.exit_stack.enter_async_context(ClientSession(self.stdio, self.write))

        await self.session.initialize()

        # List available tools
        response = await self.session.list_tools()
        tools = response.tools
        print("\nConnected to server with tools:", [tool.name for tool in tools])

    async def process_query(self, query: str) -> str:
        """Process a query using Claude and available tools"""
        messages = [
            {
                "role": "user",
                "content": query
            }
        ]

        response = await self.session.list_tools()

        available_tools = [
            {
                "type": "function",
                "function": {
                    "name": tool.name,
                    "description": tool.description,
                    "parameters": tool.inputSchema
                }
            } for tool in response.tools
        ]

        response = self.openai.chat.completions.create(
            model="gpt-4o",
            messages=messages,
            tools=available_tools,
        )
        message = response.choices[0].message

        # ツールを使わず回答できる場合はそのまま返す
        if not message.tool_calls:
            return message.content

        # ツールを呼び出していれば実行して結果をmessagesに追加する
        messages.append(message)
        for tool_call in message.tool_calls:
            tool_name = tool_call.function.name
            tool_call_id = tool_call.id

            # Execute tool call
            tool_args = json.loads(tool_call.function.arguments)
            tool_result = await self.session.call_tool(tool_name, tool_args)
            tool_result_contents = [content.model_dump() for content in tool_result.content]

            print(
                "=================\n"
                f"Use Tool: {tool_name}\n"
                f"- Tool Arguments: {tool_args}\n"
                f"- Tool Result: {tool_result_contents}\n"
                "================="
            )

            messages.append(
                {
                    "tool_call_id": tool_call_id,
                    "role": "tool",
                    "name": tool_name,
                    "content": tool_result_contents,
                }
            )

        response = self.openai.chat.completions.create(
            model="gpt-4o",
            messages=messages,
        )
        return response.choices[0].message.content

    async def chat_loop(self):
        """Run an interactive chat loop"""
        print("\nMCP Client Started!")
        print("Type your queries or 'quit' to exit.")

        while True:
            try:
                query = input("\nQuery: ").strip()

                if query.lower() == 'quit':
                    break

                response = await self.process_query(query)
                print("\n" + response)

            except Exception as e:
                print(f"\nError: {str(e)}")

    async def cleanup(self):
        """Clean up resources"""
        await self.exit_stack.aclose()


async def main():
    if len(sys.argv) < 2:
        print("Usage: python client.py <path_to_server_script>")
        sys.exit(1)

    client = MCPClient()
    try:
        await client.connect_to_server(sys.argv[1])
        await client.chat_loop()
    finally:
        await client.cleanup()

if __name__ == "__main__":
    import sys
    asyncio.run(main())
事前にOPENAI_API_KEYを環境変数に設定する必要がありますのでご注意ください。
ここでMCP Serverへリクエストを送っている箇所は2つあります。
まず、58行目の以下では利用可能なツールの情報をServerから取得しています。
response = await self.session.list_tools()以下は実行結果です。
{
    "nextCursor": null,
    "tools": [
        {
            "name": "get-alerts",
            "description": "Get weather alerts for a state",
            "inputSchema": {
                "type": "object",
                "properties": {
                    "state": {
                        "type": "string",
                        "description": "Two-letter state code (e.g. CA, NY)"
                    }
                },
                "required": [
                    "state"
                ]
            }
        },
        {
            "name": "get-forecast",
            "description": "Get weather forecast for a location",
            "inputSchema": {
                "type": "object",
                "properties": {
                    "latitude": {
                        "type": "number",
                        "description": "Latitude of the location"
                    },
                    "longitude": {
                        "type": "number",
                        "description": "Longitude of the location"
                    }
                },
                "required": [
                    "latitude",
                    "longitude"
                ]
            }
        }
    ]
}ツールごとにname、description、inputSchemaが定義されています。これはOpenAIと類似しており、inputSchemaをparametersに変更すればそのまま利用できます。
次に、90行目の以下ではツールを実行しています。
tool_result = await self.session.call_tool(tool_name, tool_args)
tool_result_contents = [content.model_dump() for content in tool_result.content]戻り値の型はlist[types.TextContent | types.ImageContent | types.EmbeddedResource]であり、それぞれpydantic.BaseModelを継承しています。このままではOpenAIのFunction Callingでは利用できないのでmodel_dumpメソッドでdict型に変換しています。
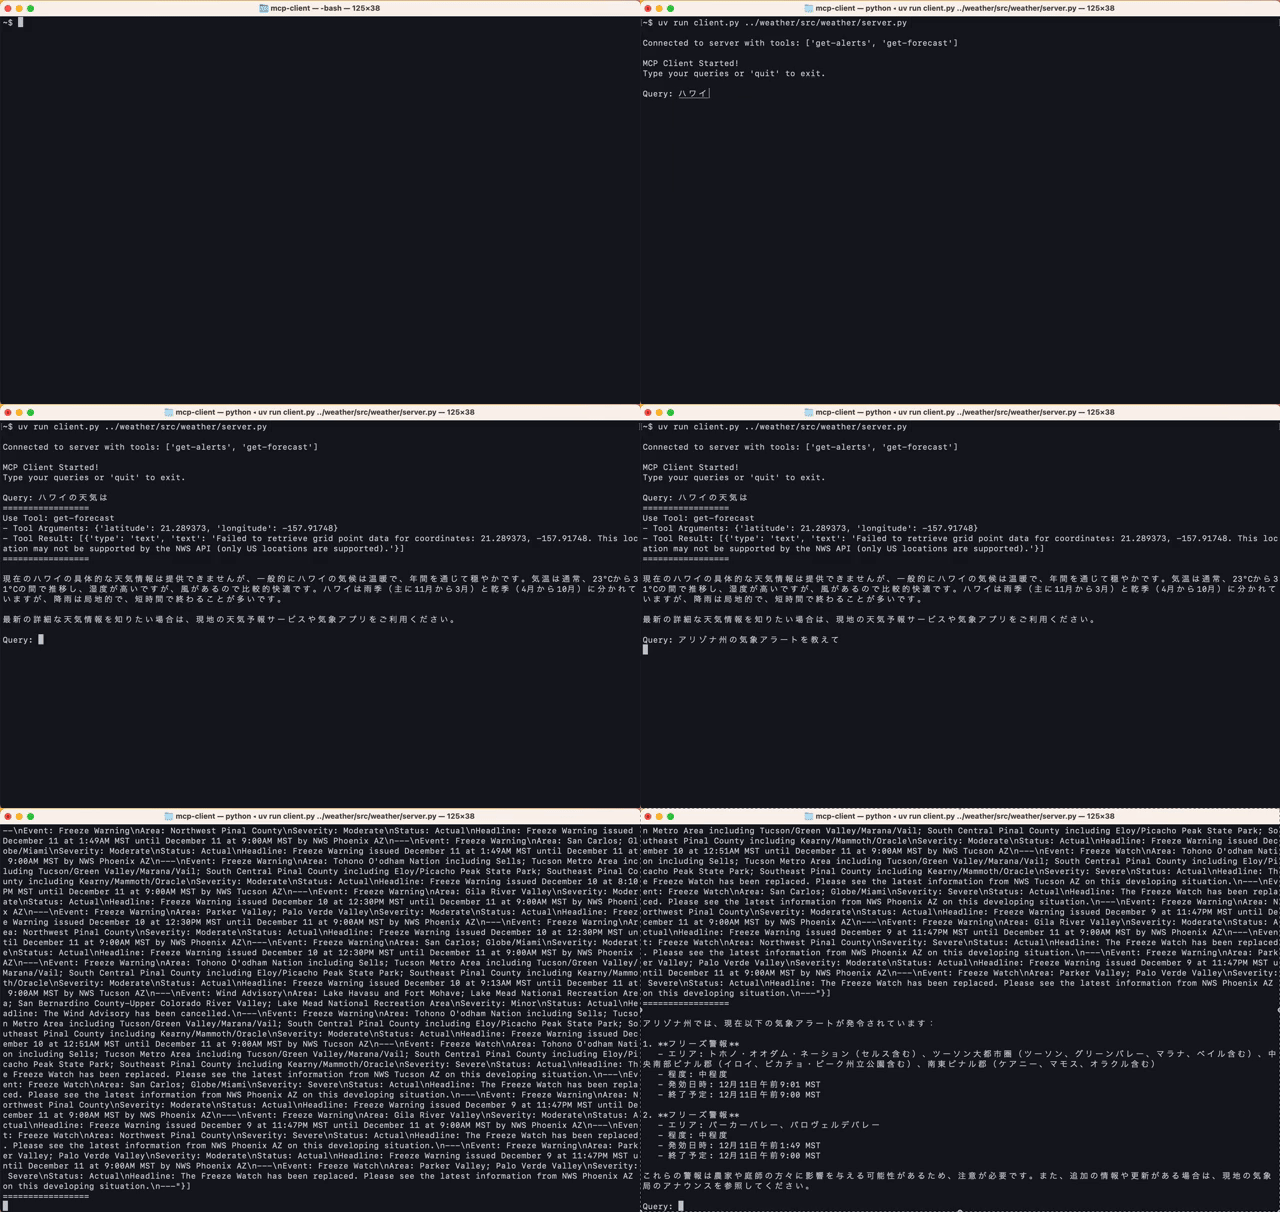
それでは実際にMCP Clientを実行してみます。
cd mcp-client
uv run client.py ../weather/src/weather/server.py
これでOpenAIのモデルを用いてMCPを利用することができました。
MCP Clientの位置付け
MCPの公式ドキュメントには以下の図が記載されています。

- MCP Hosts: Programs like Claude Desktop, IDEs, or AI tools that want to access data through MCP
- MCP Clients: Protocol clients that maintain 1:1 connections with servers
- MCP Servers: Lightweight programs that each expose specific capabilities through the standardized Model Context Protocol
- Local Data Sources: Your computer’s files, databases, and services that MCP servers can securely access
- Remote Services: External systems available over the internet (e.g., through APIs) that MCP servers can connect to
Model Context Protocol: Introduction
現在の実装だとMCP Serverは必ず自身のローカルPCに存在する必要があります。インターネット上に公開されたサービスにアクセスする場合は、ローカルPC上のMCP Serverから接続する必要があります。ただし、この図にはMCP Clientが含まれない点に疑問を感じ、Core Architectureの以下の図を見てみました。

Core architecture - Model Context Protocol
どうやらMCP Host内にMCP Clientが含まれるようです。MCP ClientはMCP Serverと1対1接続し、MCP Hostが複数のMCP Clientを管理しています。

Claude Desktop App
The Claude desktop application provides comprehensive support for MCP, enabling deep integration with local tools and data sources.
Clients - Model Context Protocol
こちらの表は各MCP Clientがサポートしている特性を表しています。
先ほどの図ではClaude Desktop AppはHostであると説明されていたため解釈が難しいですが、Claude Desktop Appで動作するClientがサポートする機能として捉えることができます。
表からわかるようにMCPはResources、Prompts、Tools、Sampling、Rootsをサポートしており、Claude Desktop Appはその内3つをサポートしています。今回はFunction Callingを用いることでToolsをMCP Clientで利用しましたが、その他の機能についても今後触れてみたいと思います。
最後に
今回はMCP ClientをOpenAIモデルで実装しました。
MCP Serverは様々な機能をMCP Clientに提供しますが、今回扱ったToolsにおいて実現できることはFunction Callingとそれほど変わりません。しかし、MCPはサーバーとクライアントの責任を明確に分離することで、開発のスピードを一層加速させるように設計されており、これによってLLMが利用できるツールやリソースの選択肢が増えたことは非常に大きなインパクトがあります。今後はMCPを活用して様々なツールと連携するAIエージェントを作成してみたいと考えています。
ここまでお読みいただきありがとうございました。
MCPについて以前投稿した記事(【AI Shift Advent Calendar 2024】MCP(Model Context Protocol)を用いた予約対話AIエージェントの構築と動作のトレース)もぜひご覧ください。


